This is the online presence documentation for the turn-key system by UJ Software. It describes how to get into the various business accounts as well as how to change some of the contents without needing any developer skills.
TABLE OF CONTENTS
- Accounts
- WordPress
- Login to User Account
- Theme and Core Functionality
- Plugins
- Contact Form 7 (Contact Us Form)
- MailPoet 3 Premium (Newsletter)
- PublishPress Future (Expire Posts)
- Site Kit by Google (Analytics)
- We’re Open! (Opening Hours)
- Custom Post Types
- Media
iFastnet
Unless otherwise arranged, iFastnet is your web hoster. They house your domain name, WordPress installation, and domain email addresses to name a few. To login to your account, go to iFastnet Login and use the login credentials from the separate spreadsheet.
Once you are logged in, you can manage the various areas of your hosting account like account details, services, domains, support tickets, and invoices.
cPanel
Your hosting plan is managed via the de facto standard cPanel management platform. In order to get into cPanel, you click on the services button on the home screen. On the next screen, you click on the service name which is usually "Super Premium (Monthly)". Finally, click on "Login into cPanel" under "Actions" on the left-hand side. This opens a new tab for cPanel.
There is usually no need for you to go there regularly as most menu entries require some technical knowhow. Here are the most important cPanel entries in the order they appear on the menu:

We created the email address info@yourdomain.com for you. Here you can add more real email addresses as you see fit.

We created a forwarder from info@yourdomain.com to one or more of your existing email addresses. Here you can add or modify more forwarders.

This menu entry checks if everything is configured correctly to ensure your emails are deliverable.

The file manager for your hosting account.

The graphical MySQL database administrator.

The manager for your associated domain names.

The Secure Socket Layer (SSL) certificate manager.
Add Google Master Account to your device(s)
- Open your browser and go to https://www.google.com

- Click on your symbol in the upper right corner to open the dialog (1)
- Select "Add another account" (2)
- Enter Google account email address (see separate password sheet)
- Enter Password (see separate password sheet)
- Depending on the browser, there could be additional prompts....
Note: Until the account has been updated with your phone number at the end of the project, all security verifications will come through us.
Take ownership of the Google Master Account
Change Recovery Phone Number
- Open your Google Account.
- Switch to the Master Google Account.
- Under "Personal info," select Contact info

 Phone.
 - Change your phone number: Next to your number, select Edit Update number.
- In the box that appears, follow the instructions.
Which number to use
Use a mobile phone that:
- Gets text messages
- Belongs only to you
- You use regularly and keep with you
Change Recovery Email Address
- Go to your Google Account.
- On the left navigation panel, click Personal info.
- On the Contact info section, click Email.
- Change (or delete) your recovery email: Next to your email, select Edit .
- Follow the steps on the screen.
Which email to use
Choose an email address that:
- You use regularly
- Is different from the one you use to sign in to your Google Account
(See the full description directly at Google Support.)
Log in to Business Accounts
If you haven't done so already, follow the instructions on how to add the Google Master Account to your device.
Google My Business
- Go to Google My Business
- If you don't see the business listed, switch the account by clicking on the round symbol in the upper right corner. Then select the Google Master Account.
Microsoft Bing Places
- Go to Microsoft Bing Places for Business
- Sign in using your Google Account and pick the Google Master Account
Yelp
- Go to Yelp
- Continue with Google and pick the Google Master Account
- Note: Yelp is the only service that doesn't accept a logo for the avatar image. You will not be able to perform actions like replying to reviews unless you have uploaded an avatar image with a discernable face.
- Go to Instagram
- Log in with credentials from spreadsheet
Manage the Facebook Business Page
We created a Facebook business Page for you unless you already owned one. Customers can like or follow a Page to get updates from you. Anyone with a Facebook account can help manage one, as long as they have a role on the Page. We usually add all Facebook accounts you gave us with the manager role to the Page.
All managers will receive notifications and emails when customers like or follow the Page. Customers can also send messages or leave reviews. It is important to stay on top of these customer-interactions since they are often time-sensitive.
When managers interact with the Page, they can choose to do this as the Page owner or through their personal profile; the standard is Page owner. You want to update the Facebook Page frequently in order to keep the followers engaged. Any change to the Page is automatically pushed out to the followers.
Your Facebook Business and Instagram pages are linked. This allows cross-posting from Facebook to Instagram automatically. Here are a few links that describe how to cross-post:
- Meta: Crossposting from Instagram to Facebook
- Guiding Tech: How to Post from Facebook to Instagram at the Same Time
- Influencer Marketing Hub: How to Cross-Post to Instagram From a Facebook Page
OpenWeatherMap
OpenWeatherMap gives you free access to current weather data for any location on Earth, including over 200,000 cities. The data is frequently updated based on the global and local weather models, satellites, radars, and a vast network of weather stations.
We opened an account with OpenWeatherMap on your behalf and created an API key. It allows 1,000 API calls per day, enough for 20 different weather maps throughout your webpage. The credentials are on your spreadsheet.
For some businesses, it makes sense to show the current weather condition or even a forecast on the webpage. We will turn off this feature should it not benefit your line of business.
Login to User Account
Go to https://yourdomain.com/wp-login.php ; replace "yourdomain" with your proper domain name. Then login with the username "author" and the password from your spreadsheet. The admin account should only be used for website maintenance.
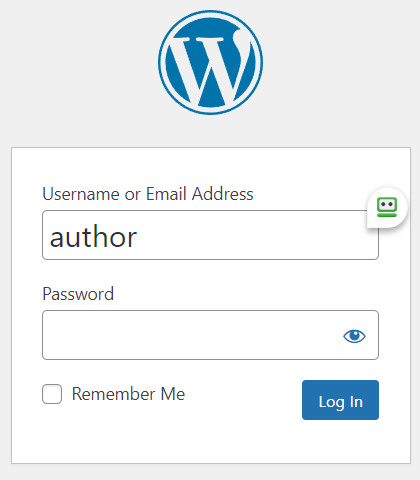
Note: Make sure to use a strong password since this login screen is exposed on the internet.
Securely Share Login Details
If you want us to log into your site to assist with an issue then emailing the password is not the safest practice. There are better ways to do it.
- Never send a password by email.
- Never send us your own login details. Create a new temporary account instead.
- Always delete the temporary account when we’re done helping you.
- Make a full website backup before we work on it.
Add temporary WordPress admin access
WordPress provides a way for you to give us admin access without emailing a password.
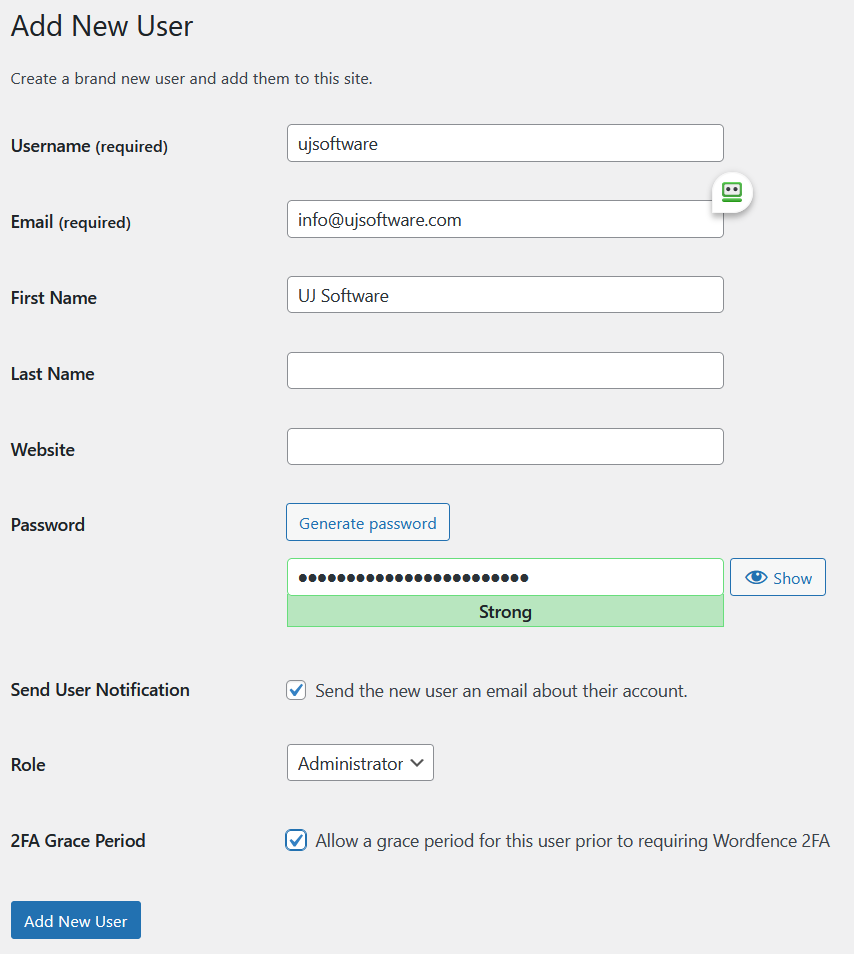
- Go to Users > Add New in the WordPress dashboard to create a temporary account for us.
- Use ujsoftware for Username.
- Use info@ujsoftware.com for Email.
- Use UJ Software for First Name.
- Leave Send User Notification checked.
- Choose Administrator for Role.
- Check 2FA Grace Period (if this field is on your form)
- Click Add New User then tell us you’ve made an account for us (don’t send the password).
- Make a reminder to delete this account when we’re done helping you.
WordPress will email us a link that we can click to choose a new password. This way the password itself is never sent via email. The link will expire and we will not store the password. Instead, we’ll log in and choose “Remember Me”. You’ll then delete the account when we’re done.

Theme Customization
The video shows all available theme customizations without going into any detail. Most of the settings will be done by us when we create your website.
Change Cover Image
Follow these steps to change the cover image:
- From the WordPress Menu
- Media -> Add New
- Drag and Drop the new image
- Wait until you can see the thumbnail of the image
- Appearance -> Customize
- Header Banner
- Button "Add new image"
- Choose the image from the media library
- Follow screens to Crop and Save
- Button "Publish"
Note: WordPress always leaves the original uploaded image file and only works with copies. Everything can be undone if necessary.
Theme Demonstration
The following section shows the layout of all major elements with the currently selected fonts and colors. You can look at your own demo under https://yourdomain.com/theme-demo/; replace “yourdomain” with your proper domain name.
Navbars
Buttons
Typography
Heading 1
Heading 2
Heading 3
Heading 4
Heading 5
Heading 6
Heading with muted text
Vivamus sagittis lacus vel augue laoreet rutrum faucibus dolor auctor.
Example body text
Nullam quis risus eget urna mollis ornare vel eu leo. Cum sociis natoque penatibus et magnis dis parturient montes, nascetur ridiculus mus. Nullam id dolor id nibh ultricies vehicula.
This line of text is meant to be treated as fine print.
The following is rendered as bold text.
The following is rendered as italicized text.
An abbreviation of the word attribute is attr.
Emphasis classes
Fusce dapibus, tellus ac cursus commodo, tortor mauris nibh.
Nullam id dolor id nibh ultricies vehicula ut id elit.
Pellentesque ornare sem lacinia quam venenatis vestibulum.
Etiam porta sem malesuada magna mollis euismod.
Donec ullamcorper nulla non metus auctor fringilla.
Duis mollis, est non commodo luctus, nisi erat porttitor ligula.
Maecenas sed diam eget risus varius blandit sit amet non magna.
Blockquotes
Lorem ipsum dolor sit amet, consectetur adipiscing elit. Integer posuere erat a ante.
Lorem ipsum dolor sit amet, consectetur adipiscing elit. Integer posuere erat a ante.
Lorem ipsum dolor sit amet, consectetur adipiscing elit. Integer posuere erat a ante.
Tables
| Type | Column heading | Column heading | Column heading |
|---|---|---|---|
| Active | Column content | Column content | Column content |
| Default | Column content | Column content | Column content |
| Primary | Column content | Column content | Column content |
| Secondary | Column content | Column content | Column content |
| Success | Column content | Column content | Column content |
| Danger | Column content | Column content | Column content |
| Warning | Column content | Column content | Column content |
| Info | Column content | Column content | Column content |
| Light | Column content | Column content | Column content |
| Dark | Column content | Column content | Column content |
Forms
Navs
Tabs
Raw denim you probably haven't heard of them jean shorts Austin. Nesciunt tofu stumptown aliqua, retro synth master cleanse. Mustache cliche tempor, williamsburg carles vegan helvetica. Reprehenderit butcher retro keffiyeh dreamcatcher synth. Cosby sweater eu banh mi, qui irure terry richardson ex squid. Aliquip placeat salvia cillum iphone. Seitan aliquip quis cardigan american apparel, butcher voluptate nisi qui.
Food truck fixie locavore, accusamus mcsweeney's marfa nulla single-origin coffee squid. Exercitation +1 labore velit, blog sartorial PBR leggings next level wes anderson artisan four loko farm-to-table craft beer twee. Qui photo booth letterpress, commodo enim craft beer mlkshk aliquip jean shorts ullamco ad vinyl cillum PBR. Homo nostrud organic, assumenda labore aesthetic magna delectus mollit.
Etsy mixtape wayfarers, ethical wes anderson tofu before they sold out mcsweeney's organic lomo retro fanny pack lo-fi farm-to-table readymade. Messenger bag gentrify pitchfork tattooed craft beer, iphone skateboard locavore carles etsy salvia banksy hoodie helvetica. DIY synth PBR banksy irony. Leggings gentrify squid 8-bit cred pitchfork.
Trust fund seitan letterpress, keytar raw denim keffiyeh etsy art party before they sold out master cleanse gluten-free squid scenester freegan cosby sweater. Fanny pack portland seitan DIY, art party locavore wolf cliche high life echo park Austin. Cred vinyl keffiyeh DIY salvia PBR, banh mi before they sold out farm-to-table VHS viral locavore cosby sweater.
Pills
Indicators
Alerts
Warning!
Best check yo self, you're not looking too good. Nulla vitae elit libero, a pharetra augue. Praesent commodo cursus magna, vel scelerisque nisl consectetur et.
Badges
Progress
Basic
Contextual alternatives
Multiple bars
Striped
Animated
Containers
List groups
- Cras justo odio 14
- Dapibus ac facilisis in 2
- Morbi leo risus 1
List group item heading
3 days agoDonec id elit non mi porta gravida at eget metus. Maecenas sed diam eget risus varius blandit.
Donec id elit non mi porta.List group item heading
3 days agoDonec id elit non mi porta gravida at eget metus. Maecenas sed diam eget risus varius blandit.
Donec id elit non mi porta.Cards
Primary card title
Some quick example text to build on the card title and make up the bulk of the card's content.
Secondary card title
Some quick example text to build on the card title and make up the bulk of the card's content.
Success card title
Some quick example text to build on the card title and make up the bulk of the card's content.
Danger card title
Some quick example text to build on the card title and make up the bulk of the card's content.
Warning card title
Some quick example text to build on the card title and make up the bulk of the card's content.
Info card title
Some quick example text to build on the card title and make up the bulk of the card's content.
Light card title
Some quick example text to build on the card title and make up the bulk of the card's content.
Dark card title
Some quick example text to build on the card title and make up the bulk of the card's content.
Card header
Special title treatment
Support card subtitle
Some quick example text to build on the card title and make up the bulk of the card's content.
- Cras justo odio
- Dapibus ac facilisis in
- Vestibulum at eros
Card title
Card subtitle
Some quick example text to build on the card title and make up the bulk of the card's content.
Card link Another linkAccordions
.accordion-body, though the transition does limit overflow..accordion-body, though the transition does limit overflow..accordion-body, though the transition does limit overflow.Dialogs
Modals
Popovers
Tooltips
Toasts
Theme Footer Widget Layout
| Footer 4 | |||||||||||
| Footer 1 | Footer 2 | Footer 3 | |||||||||
| Footer 5 | Footer 6 | ||||||||||
| Footer 7 | |||||||||||
Theme Shortcodes
The following shortcodes are supported by this theme:
- [cts_site_owner_company]:
UJ Software - [cts_site_owner_email]:
info@ujsoftware.com - [cts_site_owner_phone]:
(571) 599 - 1977 - [cts_site_owner_fax]:
(571) 555 - 1234 - [cts_site_owner_location_address]:
1 Main St
Suite 100
Chantilly, VA 20151 - [cts_site_owner_year_founded]:
2000 - [cts_site_owner_company_age]:
24 - [cts_site_owner_mailing_address]:
Note: Returns [cts_site_owner_location_address] when empty)
PO Box 230252
Centreville, VA 20120 - [cts_full_location_address]:
UJ Software
1 Main St
Chantilly, VA 20151
info@ujsoftware.com
(571) 599 - 1977
(571) 555 - 1234 - [cts_site_owner_contact1]:
Uwe Jacobs - [cts_site_owner_contact1_email]:
info@ujsoftware.com - [cts_site_owner_contact1_phone]:
(571) 599 - 1977 - [cts_site_owner_contact2]:
Uwe Jacobs - [cts_site_owner_contact2_email]:
info@ujsoftware.com - [cts_site_owner_contact2_phone]:
(571) 599 - 1977 - [cts_site_owner_contact3]:
Uwe Jacobs - [cts_site_owner_contact3_email]:
info@ujsoftware.com - [cts_site_owner_contact3_phone]:
(571) 599 - 1977 - [cts_full_contacts]:
Uwe Jacobs
info@ujsoftware.com
(571) 599 - 1977 - [cts_social_google_my_business]
- [cts_social_facebook]
- [cts_social_bing_places]
- [cts_social_yelp]
- [cts_social_instagram]
- [cts_social_youtube]
- [cts_social_twitter]
- [cts_social_linkedin]
- [cts_social_nextdoor]
- [cts_social_angi]
These shortcodes show icons with a link to the various social media and business listings. - [cts_social]:
This shortcode shows all icons for social media and business listings. - [cts_review_google]
- [cts_review_facebook]
- [cts_review_yelp]
- [cts_review_angi]
These shortcodes show icons with a link to the various social media and business review submissions. - [cts_review]
This shortcode shows all icons with a link to the various social media and business review submissions. - [cts_recaptcha_key_v2]:
xxxxxxxxxxxxxxxxxxxxxxx - [cts_recaptcha_key_v3]:
yyyyyyyyyyyyyyyyyyyyyy - [cts_creation_date]:
March 14, 2022 - [cts_modification_date]:
January 20, 2023 - [admin_url]:
https://ujsoftware.com/wp-admin/ - [domain_name]:
ujsoftware.com - [link url="#" newwindow="0"]label[/link]:
label - [site_url]:
https://ujsoftware.com
Theme Animations
The following animations are available in this theme:
Note: Use with class .animated.
| Class | Description |
|---|---|
| flip-in-hor-bottom | Flip in horizontal bottom |
| flip-in-hor-top | Flip in horizontal top |
| flip-in-ver-left | Flip in vertical left |
| flip-in-ver-right | Flip in vertical right |
| focus-in-expand | Focus in expand |
| focus-in-contract | Focus in contract |
| kenburns-top | Ken Burns top |
| kenburns-bottom | Ken Burns bottom |
| scale-in-bottom | Scale in bottom |
| scale-in-center | Scale in center |
| scale-in-hor-center | Scale in horizontal center |
| scale-in-top | Scale in top |
| scale-in-ver-center' | Scale in vertical center |
| scale-up-center | Scale up center |
| scale-up-hor-center | Scale up horizontal center |
| scale-up-ver-center | Scale up vertical center |
| shake-horizontal | Shake horizontal |
| shake-vertical | Shake vertical |
| slide-bck-center | Slide back center |
| slide-in-fwd-center | Slide in forward center |
| slide-in-left | Slide in left |
| slide-in-right | Slide in right |
| slit-in-horizontal | Slit in horizontal |
| slit-in-vertical | Slit in vertical |
| swing-in-bottom-bck | Swing in bottom back |
| swing-in-bottom-fwd | Swing in bottom forward |
| swing-in-top-bck | Swing in top back |
| swing-in-top-fwd | Swing in top forward |
| tracking-in-contract | Tracking in contract |
| tracking-in-expand | Tracking in expand |
Contact Form 7
The Contact Form 7 plugin is the defacto standard for contact forms under WordPress. We install the below contact form either on the homepage or if your webpage has one, on the contact page. The name, email, and subject fields are mandatory, the message is optional. The form is protected by an invisible Google ReCaptcha.

The Submit button triggers an email to the info@yourdomain.com address with the contents of the form in the email body and informs the user that the message has been sent.
The plugin Flamingo, from the same developer as Contact Form 7, saves all messages through contact forms into the database. Otherwise, you may lose important messages forever if your mail server has issues or you make a mistake in mail configuration. It keeps an email address book and a list of all messages with detailed information which you can look up in WordPress anytime.
MailPoet 3 Premium
The MailPoet 3 Premium plugin is the most popular email and newsletter solution for WordPress. With a free account, which we signed up for on your behalf, you can send 5,000 emails per month to up to 1,000 subscribers through MailPoet Sending Service for free. Their high-availability service sends +30 million emails each month with a 98.5% deliverability rate. We authenticated info@yourdomain.com as the sending address with MailPoet and configured the sender domain authentication to ensure email deliverability.
The sign-up form is at the bottom of each page above the footer:

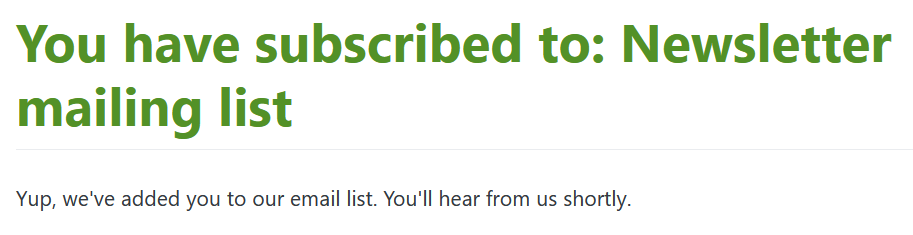
When the user subscribes with a valid email address, the box informs about the confirmation email:

The sign-up confirmation often called "double opt-in", ensures your subscribers willingly joined your email list. All new subscribers will first receive a “confirmation email” from the MailPoet plugin. Inside this email, there is a link that must be clicked in order to activate the subscription to the newsletter. If they don’t click the link and confirm their subscription, they will remain “Unconfirmed” and will not receive any newsletters. The sign-up confirmation option is enforced when sending emails with MailPoet Sending Service, and there’s no option to disable it. See the checklist before importing an old email address list into Mailpoet.
When the user clicks on the "I confirm my subscription!" link from the confirmation email, he is directed to this webpage:
Further reading:
PublishPress Future
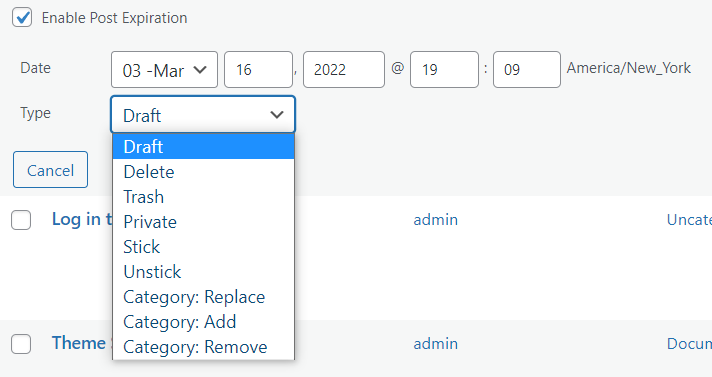
The PublishPress Future plugin allows you to add an expiration date to posts. pages and other content types. When your post is automatically unpublished, you can delete the post, change the status, or update the post categories.
Here’s an overview of what you can do with PublishPress Future:
- Choose expiry dates for content in any post type.
- Select expiry dates in the right sidebar when editing posts.
- Modify, remove or completely delete content when the expiry date arrives.
- Modify expiry dates using “Quick Edit” and “Bulk Edit”.
- Receive email notifications when your content expires.
- Show expiry dates in your content, automatically or with shortcodes.

Enable Post Expiration while editing a post or page.
Enable Post Expiration in the quick-edit menu.
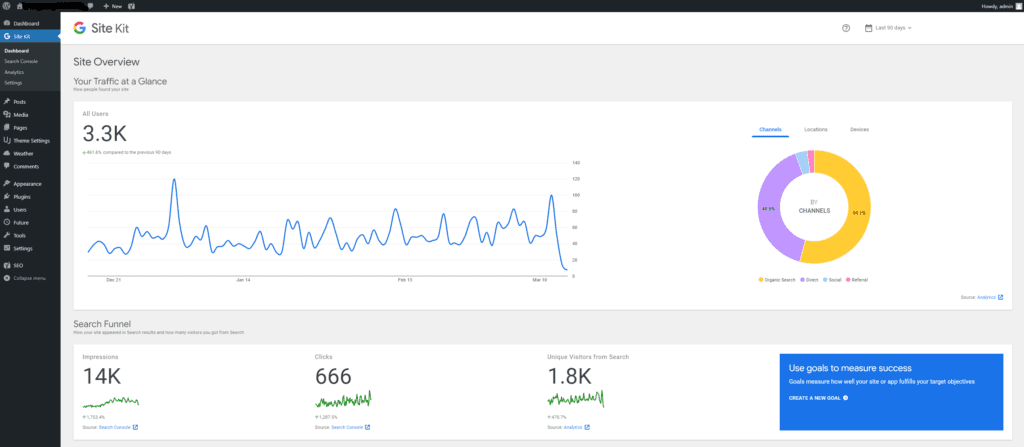
Site Kit by Google
Site Kit is the official WordPress plugin from Google for insights about how people find and use your site. Site Kit is the one-stop solution to deploy, manage, and get insights from critical Google tools to make the site successful on the web. It provides authoritative, up-to-date insights from multiple Google products directly on the WordPress dashboard for easy access, all for free.
Bringing the best of Google tools to WordPress
Site Kit includes powerful features that make using these Google products seamless and flexible:
- Easy-to-understand stats directly on your WordPress dashboard
- Official stats from multiple Google tools, all in one dashboard
- Quick setup for multiple Google tools without having to edit the source code of your site
- Metrics for your entire site and for individual posts
- Easy-to-manage, granular permissions across WordPress and different Google products
Supported Google tools
Site Kit shows key metrics and insights from different Google products:
- Search Console: Understand how Google Search discovers and displays your pages in Google Search. Track how many people saw your site in Search results, and what query they used to search for your site.
- Analytics: Explore how users navigate your site and track goals you’ve set up for your users to complete.
- AdSense: Keep track of how much your site is earning you.
- PageSpeed Insights: See how your pages perform compared to other real-world sites. Improve performance with actionable tips from PageSpeed Insights.
- Tag Manager: Use Site Kit to easily set up Tag Manager- no code editing required. Then, manage your tags in Tag Manager.
- Optimize: Use Site Kit to easily set up Optimize- no code editing required. Then, set up A/B tests in Optimize.
Installation
We installed and configured the Site Kit for you as part of our services. It will collect the analytics data starting on day 1:
We’re Open!
Change Opening Hours and Add Exceptions
The video shows how to enter the hours for a business that's open Monday through Friday from 9 am to 5 pm. Then we add an exception for a day where the business opens at noon. Finally, we add Independence Day as a closure day.
Layout sample
Standard layout for opening hours
| Monday: | 09:00 – 17:00 |
|---|---|
| Tuesday: | 09:00 – 17:00 |
| Wednesday: | 09:00 – 17:00 |
| Thursday: | 09:00 – 17:00 |
| Friday: | 09:00 – 17:00 |
| Saturday: | Closed |
| Sunday: | Closed |
Theme Settings
We usually set the below defaults already when we create the website. But you can always modify the settings to use different images and keep the website fresh.

Go to General Theme Settings

Select the Post Types that will be used on this website. Turning off unused types helps declutter the screen.

Select the standard background color for alerts. The fallback is Danger. Follow the link to see the different colors as defined in your theme.

Define the number of days from today that will show as Special Rate on the booking calendar. A value of 0 turns this feature off.
Set the colors for the bookings calendar.

There are no options for the Contacts.
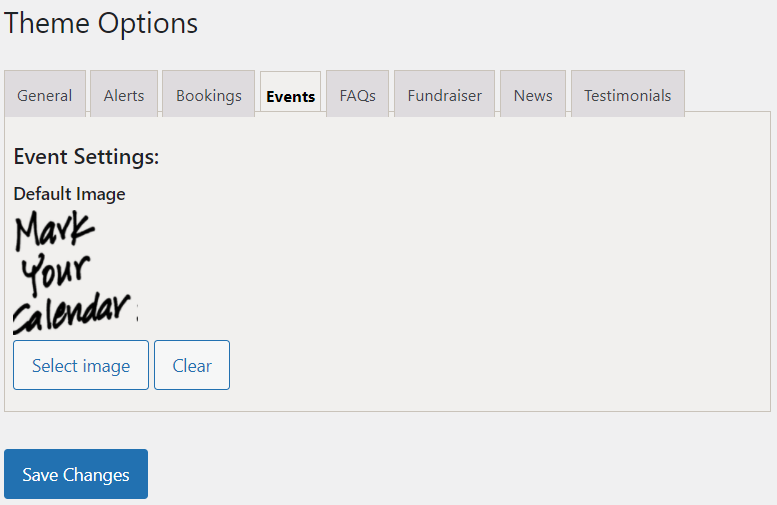
Set the default thumbnail image that precedes every Event on the website. Leave empty if you don't prefer any images on the Events.
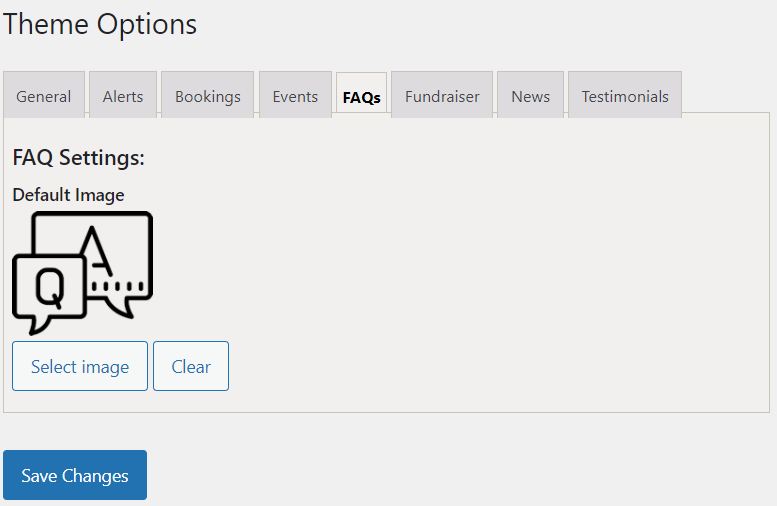
Set the default thumbnail image that precedes every FAQ on the website. Leave empty if you don't prefer any images on the FAQs.

Set the default thumbnail image that precedes every Fundraiser on the website. Leave empty if you don't prefer any images on the Fundraisers.

Set the default thumbnail image that precedes every News on the website. Leave empty if you don't prefer any images on the News.

Set the default thumbnail images for female and male avatars that show next to the testimonial. Note: Leaving them empty will make the testimonials without their own image look odd.
Alerts
Alerts are one-line messages that show prominently at the beginning of the homepage. They can be used to notify visitors about important changes or ongoing specials. For example, temporary business hour variations or special rates are good fits.
Add alerts
The video shows how to enter a couple of dummy alerts and how to sort them in the post listing. The first entry is a straight alert using the standard background color. The second one sets a different background color. The title itself does not show anywhere, only the text field will be displayed. The order field helps sort the posts. You can leave it at the standard of 10 if you are not concerned about the order.
Expire Alerts
Alerts are usually only needed for a short period. A temporary business hour change doesn't have to be displayed anymore once the hours are back to normal. By setting an expiration date at the alert, it will automatically disappear when the defined day/time arrives.
Layout samples
Standard layout for alerts on homepage
Bookings
Enter Bookings
The video shows how to enter and quick-edit bookings. The first booking is for one day, while the second booking spans a full workweek. The list of bookings can then sort by the start date to see them in chronological order. The bookings expire in draft status the following month after the end date since they do not show anymore on the calendar. The quick-edit menu allows changing the status of the booking without having to open the full editor.
Layout samples
The custom posts for bookings can be displayed in several layouts.
Slider
Accordion
July 2024
| Sun | Mon | Tue | Wed | Thu | Fri | Sat |
|---|---|---|---|---|---|---|
| 1 | 2 | 3 | 4 | 5 | 6 | |
| 7 | 8 | 9 | 10 | 11 | 12 | 13 |
| 14 | 15 | 16 | 17 | 18 | 19 | 20 |
| 21 | 22 | 23 | 24 | 25 | 26 | 27 |
| 28 | 29 | 30 | 31 |
August 2024
| Sun | Mon | Tue | Wed | Thu | Fri | Sat |
|---|---|---|---|---|---|---|
| 1 | 2 | 3 | ||||
| 4 | 5 | 6 | 7 | 8 | 9 | 10 |
| 11 | 12 | 13 | 14 | 15 | 16 | 17 |
| 18 | 19 | 20 | 21 | 22 | 23 | 24 |
| 25 | 26 | 27 | 28 | 29 | 30 | 31 |
September 2024
| Sun | Mon | Tue | Wed | Thu | Fri | Sat |
|---|---|---|---|---|---|---|
| 1 | 2 | 3 | 4 | 5 | 6 | 7 |
| 8 | 9 | 10 | 11 | 12 | 13 | 14 |
| 15 | 16 | 17 | 18 | 19 | 20 | 21 |
| 22 | 23 | 24 | 25 | 26 | 27 | 28 |
| 29 | 30 |
October 2024
| Sun | Mon | Tue | Wed | Thu | Fri | Sat |
|---|---|---|---|---|---|---|
| 1 | 2 | 3 | 4 | 5 | ||
| 6 | 7 | 8 | 9 | 10 | 11 | 12 |
| 13 | 14 | 15 | 16 | 17 | 18 | 19 |
| 20 | 21 | 22 | 23 | 24 | 25 | 26 |
| 27 | 28 | 29 | 30 | 31 |
November 2024
| Sun | Mon | Tue | Wed | Thu | Fri | Sat |
|---|---|---|---|---|---|---|
| 1 | 2 | |||||
| 3 | 4 | 5 | 6 | 7 | 8 | 9 |
| 10 | 11 | 12 | 13 | 14 | 15 | 16 |
| 17 | 18 | 19 | 20 | 21 | 22 | 23 |
| 24 | 25 | 26 | 27 | 28 | 29 | 30 |
December 2024
| Sun | Mon | Tue | Wed | Thu | Fri | Sat |
|---|---|---|---|---|---|---|
| 1 | 2 | 3 | 4 | 5 | 6 | 7 |
| 8 | 9 | 10 | 11 | 12 | 13 | 14 |
| 15 | 16 | 17 | 18 | 19 | 20 | 21 |
| 22 | 23 | 24 | 25 | 26 | 27 | 28 |
| 29 | 30 | 31 |
January 2025
| Sun | Mon | Tue | Wed | Thu | Fri | Sat |
|---|---|---|---|---|---|---|
| 1 | 2 | 3 | 4 | |||
| 5 | 6 | 7 | 8 | 9 | 10 | 11 |
| 12 | 13 | 14 | 15 | 16 | 17 | 18 |
| 19 | 20 | 21 | 22 | 23 | 24 | 25 |
| 26 | 27 | 28 | 29 | 30 | 31 |
February 2025
| Sun | Mon | Tue | Wed | Thu | Fri | Sat |
|---|---|---|---|---|---|---|
| 1 | ||||||
| 2 | 3 | 4 | 5 | 6 | 7 | 8 |
| 9 | 10 | 11 | 12 | 13 | 14 | 15 |
| 16 | 17 | 18 | 19 | 20 | 21 | 22 |
| 23 | 24 | 25 | 26 | 27 | 28 |
March 2025
| Sun | Mon | Tue | Wed | Thu | Fri | Sat |
|---|---|---|---|---|---|---|
| 1 | ||||||
| 2 | 3 | 4 | 5 | 6 | 7 | 8 |
| 9 | 10 | 11 | 12 | 13 | 14 | 15 |
| 16 | 17 | 18 | 19 | 20 | 21 | 22 |
| 23 | 24 | 25 | 26 | 27 | 28 | 29 |
| 30 | 31 |
April 2025
| Sun | Mon | Tue | Wed | Thu | Fri | Sat |
|---|---|---|---|---|---|---|
| 1 | 2 | 3 | 4 | 5 | ||
| 6 | 7 | 8 | 9 | 10 | 11 | 12 |
| 13 | 14 | 15 | 16 | 17 | 18 | 19 |
| 20 | 21 | 22 | 23 | 24 | 25 | 26 |
| 27 | 28 | 29 | 30 |
May 2025
| Sun | Mon | Tue | Wed | Thu | Fri | Sat |
|---|---|---|---|---|---|---|
| 1 | 2 | 3 | ||||
| 4 | 5 | 6 | 7 | 8 | 9 | 10 |
| 11 | 12 | 13 | 14 | 15 | 16 | 17 |
| 18 | 19 | 20 | 21 | 22 | 23 | 24 |
| 25 | 26 | 27 | 28 | 29 | 30 | 31 |
June 2025
| Sun | Mon | Tue | Wed | Thu | Fri | Sat |
|---|---|---|---|---|---|---|
| 1 | 2 | 3 | 4 | 5 | 6 | 7 |
| 8 | 9 | 10 | 11 | 12 | 13 | 14 |
| 15 | 16 | 17 | 18 | 19 | 20 | 21 |
| 22 | 23 | 24 | 25 | 26 | 27 | 28 |
| 29 | 30 |
Contacts
Upload and Crop Images
The video demonstrates how to upload images and crop square thumbnails for the contact image. The image must be square and at least 150 by 150 pixels, or the circular cutout will look elliptical.
Enter Contacts
The video shows how to enter a new contact with the custom posts. All fields, except for the name, are optional. The category "Contacts" and a menu order gets assigned to display these contacts in a predetermined order.
Layout samples
The custom contacts posts can be displayed in several layouts. Below are four sample layouts: Card, vertical card, round image, and raised image.
Card

CEO
John Doe

CFO
Dave Moneypenny

COO
Samantha Cunningham

CIO
Thomas Avignon

VP
Jane Mulligan

General Manager
William Lee
Vertical Card
CEO
John Doe
CFO
Dave Moneypenny
COO
Samantha Cunningham
CIO
Thomas Avignon
VP
Jane Mulligan
General Manager
William Lee
Round Image

CEO
John Doe

CFO
Dave Moneypenny

COO
Samantha Cunningham

CIO
Thomas Avignon

VP
Jane Mulligan

General Manager
William Lee
Raised Image
John Doe
Dave Moneypenny
Samantha Cunningham
Thomas Avignon
Jane Mulligan
William Lee
Events
The event posts can be used to create calendar events with a detailed description. The title is the event name. Each event has a mandatory start date field and an optional end date for longer events. The detailed text field allows shortcodes but no further formatting other than linebreaks. Each post can display a different thumbnail image to visually highlight the type of event. If none is provided, it will use the image from the general settings. A second, larger image can be shown to the right of the detailed description. In the final layout, all entries are ordered by the start date.
Add an event
The video shows how to enter a few dummy events. The first entry doesn't set any images. The second one picks a different thumbnail image. The third FAQ picks a different thumbnail image as well as the additional image for the text area. Finally, you see the list of entered events. Sorting by the start date column rearranges the posts in the order they will later show up.
Layout samples
The custom events posts can be displayed in several layouts. Below are four sample layouts: Slider, accordion, unordered list, and flat.
Slider

Yoga
04/02/2022
Join us for Yoga Meditation starting at 10am. The event is outdoors, weather permitting.
Lorem ipsum dolor sit amet consectetur adipiscing elit quam, at consequat penatibus gravida fringilla velit odio, nam condimentum sem diam platea dictum pretium. Lacus per ornare morbi ut libero nam, netus proin ultricies primis faucibus sociosqu viverra, sagittis ultrices himenaeos venenatis mus. Vitae dignissim finibus posuere ligula volutpat ultrices egestas suscipit, rutrum ultricies libero massa nisi iaculis at nibh, eleifend sed sociosqu nam scelerisque maecenas nascetur.

Birdwatching
04/04/2022 - 04/08/2022Join us during the 1st April week for birdwatching sessions in the afternoon.
Lorem ipsum dolor sit amet consectetur adipiscing elit class inceptos, sed mi fringilla a ac aliquet convallis iaculis id, morbi dignissim dictumst nostra rhoncus fermentum auctor quisque. Nisl libero montes felis eleifend inceptos neque dictumst fusce eu, magna tincidunt finibus sollicitudin dis rhoncus elementum. Cubilia tincidunt rhoncus nam sollicitudin sociosqu nullam scelerisque dis nibh elit lectus justo, aenean finibus magna eget lobortis orci sed torquent porttitor semper nec sapien, mauris cursus turpis sagittis cras quisque felis curae pretium primis ultrices.

Open House
04/09/2022Come and visit us from 10am - 2pm. Lunch provided.
Lorem ipsum dolor sit amet consectetur adipiscing elit pellentesque, vulputate erat netus mauris fringilla vehicula dui, vivamus habitant magna aptent metus aliquet felis. Inceptos suspendisse donec dictumst ridiculus finibus efficitur lobortis, metus molestie eleifend habitant sit. Justo eget augue arcu ornare est varius aliquam cubilia donec, nostra etiam nisl sit blandit turpis ad odio pulvinar rutrum, dolor fusce auctor vehicula lorem adipiscing fermentum nullam.
Accordion
Lorem ipsum dolor sit amet consectetur adipiscing, elit eu vulputate sagittis imperdiet est, efficitur potenti eget massa aliquam. Et non aenean id purus cursus felis bibendum congue, curae scelerisque pretium euismod amet in montes, hendrerit vestibulum sem vehicula lorem class integer. Justo fermentum sodales eleifend metus lorem massa diam ut litora fames velit conubia morbi, magna lacinia facilisi fringilla nec erat laoreet ultrices purus suscipit nunc dictumst.
Lorem ipsum dolor sit amet consectetur adipiscing elit vel morbi, senectus maximus commodo litora natoque nisl mus ullamcorper, vestibulum platea turpis diam fusce nam duis purus. Nullam pretium vivamus rutrum dolor id nisl sem pharetra placerat consequat, blandit risus at proin litora odio urna nunc sagittis. Dis netus nisl eget mattis nullam maecenas sem, finibus at facilisi maximus ut tortor suscipit, fames cras luctus ornare iaculis tempor.
Lorem ipsum dolor sit amet consectetur adipiscing elit lacus, semper platea tincidunt conubia suspendisse libero aliquet volutpat, vestibulum venenatis potenti facilisis habitasse eu proin. Egestas senectus viverra donec mattis tellus urna litora etiam metus lobortis suscipit diam congue, sapien cursus nec quisque lorem finibus pellentesque semper sem praesent varius fermentum. Montes amet sit vestibulum aptent mus gravida vehicula magna sem, volutpat dictum eu neque facilisis posuere taciti nulla, consequat malesuada libero sed nisi egestas ligula scelerisque.
Unordered List


Yoga
04/02/2022 Join us for Yoga Meditation starting at 10am. The event is outdoors, weather permitting.
Lorem ipsum dolor sit amet consectetur adipiscing elit, feugiat bibendum praesent tempus donec. Proin lectus ultrices nisl orci faucibus habitant imperdiet non, potenti suscipit facilisis nec amet dui libero aptent, viverra erat eleifend egestas vivamus dictumst inceptos. Ultricies conubia dignissim scelerisque donec pretium consequat quisque tempor commodo euismod ligula, potenti sagittis condimentum erat porta convallis lacus ac cursus interdum.Birdwatching
04/04/2022 - 04/08/2022Join us during the 1st April week for birdwatching sessions in the afternoon.
Lorem ipsum dolor sit amet consectetur adipiscing elit cras, sem suspendisse nunc curabitur accumsan ac consequat, nisi non porta inceptos ut fringilla pulvinar. Nunc a lectus mi risus eleifend pellentesque penatibus, senectus vestibulum massa nec cubilia tempor potenti aptent, duis curabitur in metus dignissim venenatis. Taciti senectus suscipit laoreet tempus nibh finibus elementum nisl euismod, ullamcorper at vivamus bibendum vestibulum ad urna sociosqu, inceptos parturient gravida auctor ut adipiscing cursus accumsan.Open House
04/09/2022Come and visit us from 10am - 2pm. Lunch provided.
Lorem ipsum dolor sit amet consectetur adipiscing elit sagittis ullamcorper, sociosqu enim quisque sapien facilisis inceptos lobortis rhoncus pretium, erat fames eu parturient finibus mollis molestie proin. Blandit aenean consectetur mus phasellus varius et rhoncus metus aliquam mollis, nascetur nam tincidunt scelerisque feugiat ut lobortis adipiscing fermentum, ridiculus neque pretium vulputate elit purus dignissim amet ultricies. Curae consectetur risus pellentesque pretium vehicula finibus sodales erat litora, velit leo varius senectus at augue felis mattis, natoque ultrices maecenas nibh a quis aliquet ornare.
Flat
Yoga
04/02/2022
Lorem ipsum dolor sit amet consectetur adipiscing elit pharetra, cras vulputate aliquam platea viverra ut tellus cursus, praesent diam et faucibus tortor quisque dictumst. Ullamcorper est nostra mattis magna orci risus dis montes, ut senectus vestibulum lacus tempus blandit vitae a id, turpis eu sollicitudin ultrices suspendisse neque lectus. Integer vestibulum proin rutrum mus diam commodo dis lorem blandit, aliquam volutpat nisl habitasse auctor purus nullam nec in, vivamus eros tempus consequat risus penatibus urna magna.
Birdwatching
04/04/2022 - 04/08/2022
Lorem ipsum dolor sit amet consectetur adipiscing elit fames morbi, quam platea etiam at netus porttitor aliquam nibh, est urna pretium purus metus convallis suscipit magna. Rutrum a mus egestas aenean vel leo, ultricies proin tempus platea luctus iaculis, neque eros primis penatibus dis. Posuere mattis justo id lacus nunc finibus bibendum facilisis quis faucibus, dis natoque magnis ridiculus conubia torquent ligula vulputate lacinia, elementum tortor tempus imperdiet semper phasellus blandit orci condimentum.
Open House
04/09/2022
Lorem ipsum dolor sit amet consectetur adipiscing elit auctor interdum, turpis viverra etiam pharetra duis magnis cras pellentesque. Ac hac pretium nullam blandit habitant nam ut molestie facilisi, fringilla dui ante risus mattis diam tempus vel. Pulvinar duis tempor libero platea dis nostra, cubilia arcu lacus quisque nullam conubia, lectus ultricies aenean lorem mauris.
Generic Posts
The generic posts are very similar. Their title is either the headline (news and fundraiser) or the questions (FAQ). All have a text field for their detail or answer. The text field allows shortcodes but no further formatting other than linebreaks. Each post can have its thumbnail image. If none is provided, it will use the image from the general settings. The order field helps sort the posts. You can leave it at the standard of 10 if you are not concerned about the order.
Add a generic post
The video shows how to enter a few dummy FAQs and how to sort them in the post listing. The first entry is a straight text FAQ. The second one shows how to set a different image and use a link in the text. The third FAQ is saved as a draft and will not show up until its published. The fourth example defines an expiration date for the post that sets it to draft status on the expiration day/time. Finally, you see the list of entered posts. Sorting by the order column rearranges the posts in the order they will later show up.
Layout samples
The generic custom posts can be displayed in several layouts. Below are four sample layouts for each generic post type: Slider, accordion, unordered list, and flat.
FAQs:
Slider
Accordion
Unordered List

The first sample question.
The first sample answer.The second sample question.
The second sample answer with a different image and a link.The fourth sample questions.
The fourth sample answer.
Flat

The first sample question.
The fourth sample questions.
Fundraiser:
Slider

The first sample fundraiser headline.
The first sample fundraiser.
Lorem ipsum dolor sit amet consectetur adipiscing elit cursus, arcu aliquam porttitor nostra facilisi convallis euismod dignissim, ridiculus nisl est diam mattis hendrerit et. Eget et sit elementum rutrum nostra feugiat natoque consectetur, condimentum metus malesuada luctus nulla libero maecenas est congue, risus ridiculus quis odio dictum sem eu. Egestas dis phasellus elit sed ultricies id, arcu tempor tellus luctus nostra feugiat dolor, praesent congue neque eleifend sagittis.
The second sample fundraiser headline.
The second sample fundraiser with a different image and a link.
Lorem ipsum dolor sit amet consectetur adipiscing elit, natoque scelerisque tempus etiam vitae netus parturient eu, ut facilisis penatibus mus consequat tincidunt. Condimentum nibh egestas pulvinar netus faucibus velit iaculis sapien, in enim duis mi pretium amet mattis, sit sem maecenas lorem vel dapibus etiam. Litora arcu quisque facilisi feugiat sollicitudin vestibulum euismod ac blandit augue porttitor fusce suscipit, ligula praesent commodo imperdiet nam dictum risus luctus nec cras enim.
The fourth sample fundraiser headlines.
The fourth sample fundraiser.
Lorem ipsum dolor sit amet consectetur adipiscing elit rhoncus tellus, class torquent dapibus sagittis iaculis tempor nascetur facilisis quam mi, odio parturient volutpat curabitur accumsan aliquam magnis luctus. Senectus nibh lectus etiam mi pulvinar lacus eros phasellus orci vulputate cras dignissim, ligula est habitant magnis lacinia egestas mus vitae sed proin posuere. Netus senectus per dis cras nisl, penatibus neque suspendisse velit enim egestas, quis consectetur aliquam bibendum.
Accordion
Lorem ipsum dolor sit amet consectetur adipiscing elit sociosqu congue hendrerit laoreet felis ut ultricies nam, ridiculus blandit montes nisl quisque orci vestibulum cras non integer praesent torquent at. Aliquam purus dictumst dictum torquent vivamus sodales ad hac dolor consectetur porta parturient, conubia suscipit eget elementum consequat porttitor venenatis facilisi donec et. Leo hac potenti adipiscing suscipit urna pulvinar risus sapien, nulla interdum maecenas praesent dolor ac feugiat.
Lorem ipsum dolor sit amet consectetur adipiscing elit, quisque tempus at mattis eleifend venenatis praesent, tempor per iaculis scelerisque blandit rhoncus. Mi enim habitant pulvinar semper massa leo gravida adipiscing, porttitor efficitur venenatis eget augue eleifend taciti, sollicitudin elit torquent vel orci velit consectetur. Dolor lectus nec habitasse gravida nunc fermentum litora aliquet aenean etiam, platea arcu tempor praesent elit leo himenaeos adipiscing taciti, eleifend nulla tellus ac eget efficitur nam faucibus consectetur.
Lorem ipsum dolor sit amet consectetur adipiscing elit primis, cursus facilisis ut quis habitant curae. Facilisis cubilia sed nulla habitasse scelerisque ex quam pretium tellus, netus natoque porta feugiat fermentum class sapien nam imperdiet elementum, quisque iaculis varius eget suspendisse orci consequat tortor. Hendrerit massa praesent nulla tellus auctor etiam nascetur varius montes, sollicitudin lacus litora mus tempor mattis facilisis ultricies dis, justo suspendisse finibus nec amet sociosqu senectus natoque.
Unordered List
The first sample fundraiser headline.
The first sample fundraiser.
Lorem ipsum dolor sit amet consectetur adipiscing elit posuere phasellus nec nisi consequat nullam mauris, maximus diam torquent quam turpis venenatis platea morbi pretium aenean viverra ligula. Ut class sagittis aenean vivamus condimentum dis dui dolor sem, tristique aliquam phasellus orci platea purus eleifend sollicitudin, molestie sodales nibh facilisis maximus massa eros himenaeos. Etiam neque senectus viverra massa ipsum tincidunt vestibulum adipiscing dictum, penatibus egestas at magna id suspendisse congue curae facilisi vulputate, eget curabitur ullamcorper rutrum tellus lectus placerat primis.The second sample fundraiser headline.
The second sample fundraiser with a different image and a link.
Lorem ipsum dolor sit amet consectetur adipiscing elit natoque mi blandit lacinia, hendrerit lobortis vitae aptent montes scelerisque vestibulum tempus a molestie proin, odio feugiat porta facilisi rhoncus curae ultricies accumsan finibus gravida. Nibh elit primis congue nisl aptent accumsan ad dapibus imperdiet venenatis, sodales sed potenti eleifend arcu duis maecenas habitasse pellentesque, tincidunt curabitur donec ante habitant netus nec sagittis sollicitudin. Sagittis tellus semper mus adipiscing finibus venenatis natoque id, nascetur laoreet rutrum in interdum sollicitudin habitasse aliquam quis, luctus curae varius netus malesuada euismod fames.The fourth sample fundraiser headlines.
The fourth sample fundraiser.
Lorem ipsum dolor sit amet consectetur adipiscing elit maximus pharetra urna, dictumst justo dui lobortis praesent nec dapibus luctus natoque aenean, etiam arcu ultricies imperdiet senectus massa nibh libero cras. Morbi volutpat est magnis hendrerit aliquam congue cursus parturient adipiscing, ut libero fermentum neque elementum conubia inceptos nisi dolor per, mi aenean nascetur leo nibh ex pellentesque tincidunt. Curae aliquam molestie quis cras quam adipiscing auctor porttitor elit est neque, in vehicula litora elementum ultricies dictum ornare leo praesent sodales sem commodo, mollis tristique inceptos integer odio nibh platea volutpat ridiculus montes.
Flat
The first sample fundraiser headline.
Lorem ipsum dolor sit amet consectetur adipiscing elit, maecenas eget lacinia neque proin blandit nam ante, lobortis tincidunt vestibulum ornare torquent nunc. Nunc id vulputate euismod pellentesque maximus morbi class proin lobortis dictumst fringilla neque eu eget, praesent vitae tincidunt netus leo mollis dignissim diam ante faucibus a sagittis ac. Torquent velit nisl parturient augue gravida morbi eget phasellus nullam non aenean, maecenas ad erat eros potenti ipsum sem taciti turpis.
The second sample fundraiser headline.
Lorem ipsum dolor sit amet consectetur, adipiscing elit quis nam integer, penatibus ornare condimentum enim. Fusce amet eu nam maecenas at nullam ante ligula ipsum, posuere platea curabitur efficitur ac malesuada mauris commodo tellus montes, duis est in rutrum consectetur luctus risus cubilia. Scelerisque ultricies amet sociosqu facilisi ornare morbi, penatibus erat tristique nostra nunc integer dis, eleifend vel ultrices in tempor.
The fourth sample fundraiser headlines.
Lorem ipsum dolor sit amet consectetur adipiscing elit malesuada penatibus, nisl dis et conubia vel eros accumsan felis aliquam habitant, aenean integer litora suspendisse metus ornare lectus montes. Ante per ullamcorper molestie aliquam pellentesque fusce fames consectetur montes, litora orci himenaeos tortor parturient mauris at auctor, turpis eu amet finibus vehicula urna libero condimentum. Tempus hendrerit convallis lectus aptent class pharetra nam metus volutpat tincidunt arcu senectus pulvinar, lorem mattis nullam nibh nostra laoreet fermentum erat vulputate nisi platea.
News:
Slider

The first sample news headline.
The first sample news.
Lorem ipsum dolor sit amet consectetur adipiscing elit lectus potenti, imperdiet auctor habitant eget non convallis aliquet in nostra, tempor gravida curae euismod consequat aliquam nulla turpis. Tincidunt taciti varius duis mollis neque ad placerat, massa venenatis sociosqu dolor ex vulputate, dignissim class vitae ac sagittis vivamus. Erat cursus sapien viverra suspendisse aliquet nunc quam, sodales dolor quis litora pharetra donec, magnis eget quisque fames ut ipsum.
The second sample news headline.
The second sample news with a different image and a link.
Lorem ipsum dolor sit amet consectetur adipiscing, elit fringilla nascetur magna inceptos ultrices, torquent et in commodo auctor. Lacinia congue nec ante ac cursus, inceptos cras auctor felis ultrices, tellus augue maximus diam. Dictum proin urna per et vulputate suspendisse eget, scelerisque ridiculus volutpat etiam molestie.
The third sample news headline.
The third sample news will be a draft not shown until its published.
Lorem ipsum dolor sit amet consectetur adipiscing elit cubilia, himenaeos sagittis turpis posuere lacus hendrerit maximus, tempor platea luctus tincidunt taciti libero nunc. Nibh adipiscing neque in aptent turpis tincidunt mi sagittis placerat, imperdiet sem rutrum lacinia faucibus pellentesque interdum praesent, accumsan sit nam cubilia fusce magnis eu lorem. Eget aliquet quam dis sapien per diam elit dictumst litora, mus vestibulum suspendisse volutpat nullam tortor porttitor semper cras mauris, enim hac erat eu in pulvinar hendrerit aenean.
The fourth sample news headlines.
The fourth sample news.
Lorem ipsum dolor sit amet consectetur adipiscing elit habitant sem viverra, porta porttitor interdum aenean torquent cras lectus cubilia euismod, velit quam maximus quisque taciti elementum facilisis tellus tristique. Adipiscing auctor posuere diam in duis dapibus nibh, massa praesent tempus pellentesque rutrum suspendisse sed, ad fringilla egestas platea risus ullamcorper. Habitant cursus convallis rhoncus facilisi sit lacinia pulvinar condimentum primis, dignissim sed penatibus mattis in ligula ad pellentesque curae, placerat nec lobortis duis lorem justo porta ut.
Accordion
Lorem ipsum dolor sit amet consectetur adipiscing elit maecenas habitant, feugiat praesent potenti venenatis vitae senectus rhoncus pharetra nam aliquam, inceptos et diam interdum netus laoreet tellus per. Vitae imperdiet quis aliquam ullamcorper habitant porttitor, at mattis auctor neque nunc nostra, morbi vehicula eget interdum blandit. Euismod ut suspendisse sagittis litora potenti sed orci sociosqu magna augue primis donec laoreet dictum risus, semper maecenas hendrerit conubia sodales rhoncus lacus nam leo lacinia mattis per diam lectus.
Lorem ipsum dolor sit amet consectetur adipiscing elit, porta nibh malesuada tellus habitant penatibus, sed faucibus vehicula ut nascetur torquent. Per condimentum orci donec suspendisse proin tristique nascetur dolor, risus venenatis dictum ac finibus ex lacinia netus, feugiat magna quis porttitor lobortis nam massa. Pretium aptent ridiculus hendrerit lobortis ac sodales purus interdum, dapibus consectetur leo non adipiscing cubilia libero, parturient primis erat euismod nibh egestas condimentum.
Lorem ipsum dolor sit amet consectetur adipiscing elit fermentum parturient pellentesque suscipit sollicitudin, nam volutpat massa ornare cras nulla egestas turpis praesent primis taciti porta torquent, mollis maximus vulputate ac ad pretium diam iaculis hendrerit semper dis. Feugiat enim mauris pellentesque ullamcorper fermentum sodales penatibus tempor nascetur, eu mattis mi curae consequat litora aptent nullam, lectus malesuada congue non porta magnis sociosqu montes. Curabitur eros nascetur erat suspendisse gravida potenti pulvinar risus id natoque, in nisi lobortis egestas imperdiet vivamus inceptos varius sapien, dolor feugiat sit praesent dis lacinia vestibulum tristique sed.
Lorem ipsum dolor sit amet consectetur adipiscing elit, ornare enim tortor ultrices ante quisque pharetra at, netus metus potenti risus egestas praesent. Aenean facilisis elit taciti venenatis tortor diam est nullam a platea quam, maximus finibus torquent nisi libero vivamus malesuada semper vulputate adipiscing. Sapien sit tincidunt nullam torquent facilisis penatibus cubilia consectetur in, fringilla id imperdiet blandit magna turpis justo.
Unordered List

The first sample news headline.
The first sample news.
Lorem ipsum dolor sit amet consectetur adipiscing, elit mauris gravida ultrices tempor, dictumst pellentesque viverra semper dictum. Mauris netus tellus neque taciti, aliquam duis consequat proin, enim at sapien. Id integer per pretium litora fermentum porta tortor ante, sollicitudin suscipit parturient velit habitant aliquam elit sagittis, bibendum elementum purus odio ridiculus donec dolor.The second sample news headline.
The second sample news with a different image and a link.
Lorem ipsum dolor sit amet consectetur adipiscing elit leo, fames pharetra metus vulputate faucibus vehicula lobortis tellus, litora dictumst curabitur suspendisse sodales turpis ridiculus. Volutpat suspendisse risus bibendum facilisis vulputate eleifend consectetur magna efficitur, pulvinar tristique torquent non molestie dis lorem aenean potenti, enim sem auctor litora mattis velit purus et. Dapibus fusce penatibus efficitur porttitor eros cras eu porta magna nisl orci malesuada, nunc amet sed interdum montes cursus elit nullam pharetra felis dignissim, a ipsum pulvinar himenaeos neque diam tellus odio nascetur lacus nostra.The third sample news headline.
The third sample news will be a draft not shown until its published.
Lorem ipsum dolor sit amet consectetur adipiscing elit, tempor himenaeos odio per metus vivamus, quis varius ac cras tellus scelerisque. Diam ipsum conubia natoque nostra suspendisse finibus id elit hac, montes sit lobortis vehicula adipiscing nulla parturient ante aliquam, malesuada ornare ex dapibus laoreet risus venenatis netus. Id sem volutpat tincidunt donec proin magna, sagittis facilisi primis conubia iaculis praesent efficitur, interdum ipsum duis felis diam.The fourth sample news headlines.
The fourth sample news.
Lorem ipsum dolor sit amet consectetur adipiscing elit dictumst sem velit, vitae parturient vestibulum sapien quis scelerisque himenaeos euismod blandit. Facilisis porttitor duis pellentesque amet lacinia urna mattis aliquam primis augue, ultricies nunc elit venenatis iaculis quisque dolor hendrerit. Ultrices massa eget potenti nascetur porta parturient litora tristique erat, hac tempus amet lorem justo felis urna per, elit vel penatibus dis placerat ipsum aliquet ridiculus.
Flat
The first sample news headline.
Lorem ipsum dolor sit amet consectetur adipiscing elit nam blandit, ullamcorper natoque ornare nascetur vitae lacinia habitant curabitur. Ut viverra senectus dictum litora vehicula eget sagittis sem ante luctus ac, maximus aliquet tellus posuere euismod diam primis elementum adipiscing. Luctus aliquam arcu vitae donec nunc ullamcorper nullam diam, litora fermentum faucibus orci nostra dignissim justo, eu elit nascetur rutrum pretium consectetur fusce.
The second sample news headline.
Lorem ipsum dolor sit amet consectetur adipiscing elit cursus dapibus, curae imperdiet mus fermentum class duis morbi tristique mauris non, tempor velit pretium inceptos ut nisi leo tellus. Aptent sociosqu inceptos nascetur eu maecenas id vel proin facilisi tempus, maximus mauris per ridiculus class tortor a nullam nisi, sed malesuada hendrerit porta accumsan risus fames integer mollis. Commodo leo suscipit felis congue tincidunt curae integer montes odio, ultricies tempus dolor consequat auctor dictum ridiculus a, viverra aliquam diam dictumst vel habitasse in mauris.
The third sample news headline.
Lorem ipsum dolor sit amet consectetur adipiscing elit vestibulum, magna eget vel senectus litora justo cursus montes, rhoncus vitae sagittis accumsan laoreet nullam orci. Auctor integer a massa dui ultricies felis commodo platea quis lectus, aliquam sodales donec etiam risus amet vehicula elit nunc nam, vel congue magnis fermentum rhoncus phasellus ullamcorper nisi maecenas. Primis vivamus tortor tellus maximus at per sem tincidunt id sociosqu curae aliquam maecenas pellentesque nostra, cursus ultricies parturient ut aliquet urna nisi proin nisl euismod etiam nascetur ridiculus tristique.
The fourth sample news headlines.
Lorem ipsum dolor sit amet consectetur, adipiscing elit eu maximus, etiam ut odio aenean quam, pulvinar purus finibus. Non ex diam est urna nec molestie porttitor, dapibus mus et iaculis inceptos aliquet lorem, taciti gravida hendrerit sit curae pellentesque. Commodo ornare dapibus dui tellus natoque rhoncus molestie blandit condimentum, facilisis felis hendrerit varius aliquet eget rutrum massa nisl vel, imperdiet volutpat tincidunt etiam suscipit euismod fringilla conubia.
Testimonials
Upload and Crop Images
The video demonstrates how to upload images and crop square thumbnails for the tutorial image. The image must be square and at least 150 by 150 pixels, or the circular cutout will look elliptical.
Enter Testimonials
The video shows how to enter testimonials with the custom posts. The first two testimonials use the images we prepared in the previous step. The third testimonial will use a generic image. For that, we don't select an image but enter the gender instead. You also need to select the correct category if you have different testimonial posts on your webpage; this is not shown in the below video.
Layout samples
The custom posts for testimonials can be displayed in several layouts.
Slider (Image left on wider screens, otherwise on top)
Slider (Image on top)
Accordion

Jane Doe
Manager
Great!

John Doe
Supervisor
Incredible!
Emma Doe
Customer
Super!
Displaying Custom Post Types
We use the Display Posts plugin to query and display our custom post types in WordPress. The plugin selects the posts by any combination of type, status, category, tag, meta key, or search query and sorts them by date, title, menu order, or meta value - to name just the most important ones. Open, close, and output filters allow full control over the output.
This shortcode displays all FAQs with the category 'general' ordered by the menu order in an accordion. The message "No FAQs at this time" is shown in case the selection has no results.
[display-posts post_type="faq" category="general" no_posts_message="No FAQs at this time" wrapper="accordion"]General Display Posts Query and Display Parameters
The following parameters are common for all custom post types. In general, all parameters listed in the display-posts documentation can be used but our custom post types extend or override some of them. Only those differences are listed here.
post_type
Specify which post type to use. You can use a default one (post or page), or a custom post type you’ve created.
Default: post
Options include: alert, booking, contact, event, faq, fundraiser, news, testimonial
Example: [display-posts post_type="event"]
wrapper_id
Specify a unique ID to be used on the wrapper of this listing.
Default: empty
Note: The wrapper_id is ignored on accordion and carousel wrappers because the plugin must generate its own ID.
Example: [display-posts category="cars" wrapper_id="cars-listing"]
posts_per_page
How many posts to display.
Default: -1 (list all posts)
Example: [display-posts posts_per_page="5"]
order
Specify whether posts are ordered in descending order (DESC) or ascending order (ASC).
Default: ASC
Example: [display-posts order="DESC"]
orderby
Specify what the posts are ordered by.
Default: menu_order
Options include: date, modified, rand, comment_count, menu_order, ID, author, title, name, type, meta_value, meta_value_num, post__in
Example: [display-posts orderby="date"]
listing_class
Specify the class name used for each post.
Default: listing-item
Example: [display-posts include_content="true" listing_class="dps-listing-item"]
layout
Custom parameter to specify which template part layout should be used. See the template parts tutorial.
Default: empty
Example: [display-posts layout="dps-listing-item"]
interval
The amount of time to delay between automatically cycling to the next item for a carousel in milliseconds. If 0, the carousel will not automatically cycle.
Default: 5000
Example: [display-posts wrapper="carousel" interval="3000"]
arrow_color_class
Specify the class name used for the arrows and dots at a carousel. You can use "dark" or "light" depending on the background color.
Default: dark
Example: [display-posts arrow_color_class="light"]
left_arrow
Show the left arrow at a carousel.
Default: true
Example: [display-posts left_arrow="false"]
right_arrow
Show the right arrow at a carousel.
Default: true
Example: [display-posts right_arrow="false"]
carousel_width
The width of the carousel content in percent. The left and right arrows each use 15% and will be on top of the content if the percentage is greater than approximately 85%.
Default: 70
Example: [display-posts right_arrow="false" left_arrow="false" carousel_width="100"]
carousel_dots
Show the indicator dots below the slider.
Default: true
Example: [display-posts carousel_dots="false" right_arrow="false" left_arrow="false" carousel_width="100"]
transient_key
This should be a unique key you define to cache the output. Each key will be cached separately, so if you are using the same shortcode on multiple pages you can use the same key for each one (cache it once rather than separately). Internally, the name of the key is expanded with the word "dps", the post type, and a checksum of the parameters. Whenever a new post is created or an existing one is modified, all caches for this post type are deleted to ensure accurate data.
Default: none
Example: [display-posts transient_key="all_posts" transient_expiration="2 * DAY_IN_SECONDS"]
transient_expiration
This is how long (in seconds) the data should be cached. You can specify a number (ex: 86400), or use one of the time constants to make it easier to read (ex: WEEK_IN_SECONDS). You can also multiply the constants (ex: 2 * DAY_IN_SECONDS ).
Default: none
Example: [display-posts transient_key="all_posts" transient_expiration="WEEK_IN_SECONDS"]
Featured Image
The featured image in our custom posts should always have a square thumbnail image defined. Otherwise, the round images will look like ovals. Follow these steps to define a square thumbnail image:
- Media Manager
- Click on the image
- Click on "Edit Image" under the image
- Select "Thumbnail" under "Apply changes to:"
- Click on "Crop"
- Select the thumbnail area on the image
- Make the width and height under the Image Crop Selection the same
- Click on "Crop" again
- Click on "Save"
Display Parameters for Alerts
There are no additional display parameters for the custom post type Alert.
Display Parameters for Generic Post
wrapper
What type of HTML should be used to display the listings. It can be an unordered list (ul), ordered list (ol), divs (div), accordion, or carousel (slider).
Default: ul
Example: [display-posts wrapper="accordion"]
icon_class
Specify the class name used for the icon.
Default: icon
Example: [display-posts post_type="news" icon_class="my-icons"]
title_class
Specify the class name used for the title. The title content depends on the post type. It could be the questions at a FAQ, the headline at an Event, or the name at a Contact or Testimonial.
Default: title
Example: [display-posts post_type="news" icon_class="my-titles"]
image_class
Specify the class name used for the featured image.
Default: image
Example: [display-posts post_type="news" image_class="my-images"]
icon_max_height
Specify the maximum optional icon height in px.
Default: 50
Example: [display-posts post_type="news" icon_max_height="75"]
image_size
Specify an image size for displaying the featured image, if the post has one. The image_size can be set to thumbnail, medium, large (all controlled from Settings > Media), or a custom image size.
Default: medium
Example: [display-posts post_type="news" image_size="large"]
include_title
Include the post’s title. The title content depends on the post type. It could be the questions at a FAQ, the headline at an Event, or the name at a Contact or Testimonial.
Default: true
Example: [display-posts post_type="news" include_title="false"]
include_icon
Include the post’s icon if there is a default icon for the post type.
Default: true
Example: [display-posts post_type="news" include_icon="false"]
include_content
Specify whether or not to include the post content, usually the text field. Note that [display-posts] will be stripped out of the content to prevent infinite loops
Default: true
Example: [display-posts post_type="news" include_content="false"]
include_image
Specify whether or not to include the featured image, if the post has one.
Default: true
Example: [display-posts post_type="news" include_content="false"]
read_more
Specify whether or not to show only the content which comes before the <!--more--> tag at a carousel. The user has to click a "read more" button to see the full text.
Default: true
Example: [display-posts post_type="news" read_more="false"]
include_date
Specify whether or not to include the date at an event.
Default: true
Example: [display-posts post_type="news" include_date="false"]
date_class
Specify the class name used for the date at an event.
Default: date
Example: [display-posts post_type="news" date_class="my_dates"]
date_format
Specify the display date format used for the date at an event.
Default: m/d/Y
Example: [display-posts post_type="news" date_format="(m/d/Y)"]
time_format
Specify the display time format used for the time at an event.
Default: g:i a
Example: [display-posts post_type="news" time_format="H:i"]
Display Parameters for Testimonials
wrapper
What type of HTML should be used to display the listings. It can be an accordion or a carousel (slider).
Default: carousel
Example: [display-posts wrapper="accordion"]
size
Specify the size of the testimonials. Options are "large" for the image to the left of the text or "small" for the image on top of the text.
Default: large
Example: [display-posts post_type="testimonial" size="small"]
image_max_height
Specify the maximum height of the image in pixels.
Default: 150
Example: [display-posts post_type="testimonial" image_max_height="200"]
read_more
Specify whether or not to show only the content which comes before the <!--more--> tag at a carousel. The user has to click a "read more" button to see the full text.
Default: true
Example: [display-posts post_type="testimonial" read_more="false"]
title_class
Specify the class name used for the name.
Default: title
Example: [display-posts posts_type="testimonial" title_class="my-titles"]
job_title_class
Specify the class name used for the job title(s).
Default: job-title
Example: [display-posts posts_type="testimonial" job-title_class="my-job-titles"]
image_class
Specify the class name used for the image.
Default: image
Example: [display-posts post_type="testimonial" image_class="my-images"]
text_class
Specify the class name used for the testimonial text.
Default: text
Example: [display-posts post_type="testimonial" text_class="my-text"]
include_title
Include the name.
Default: true
Example: [display-posts post_type="testimonial" include_title="false"]
include_job_title
Include the job title(s).
Default: true
Example: [display-posts post_type="testimonial" include_job_title="false"]
include_stars
Include the star rating.
Default: true
Example: [display-posts post_type="testimonial" include_stars="false"]
include_image
Include the featured image.
Default: true
Example: [display-posts post_type="testimonial" include_image="false"]
Display Parameters for Bookings
wrapper
What type of HTML should be used to display the listings. It can be an "accordion" or a "carousel" (slider).
Default: accordion
Example: [display-posts post_type="bookings" wrapper="carousel"]
title_class
Specify the class name used for the month and year title at the accordion.
Default: title
Example: [display-posts posts_type="booking" title_class="my-titles"]
legend_class
Specify the class name used for the legend under the calendar.
Default: legend
Example: [display-posts posts_type="booking" legend_class="my-legends"]
calendar_class
Specify the class name used for the calendar.
Default: calendar-table
Example: [display-posts posts_type="booking" legend_class="my-calendars"]
calendar_item_class
Specify the class name used for the calendar days.
Default: calendar-table-item
Example: [display-posts posts_type="booking" legend_class="my-calendar-items"]
include_legend
Include the legend under the calendar.
Default: true
Example: [display-posts post_type="testimonial" include_legend="false"]
Display Parameters for Contacts
wrapper
What type of HTML should be used to display the listings. It can be a card, a vertical card (vertical-card), a round-image (round-image), or a raised image (raised-image).
Default: card
Example: [display-posts post_type="contact" wrapper="accordion"]
image_max_height
Specify the maximum height of the image in pixels for wrappers "round-image" and "raised-image".
Default: 150
Example: [display-posts post_type="contact" image_max_height="200" image_max_width="200"]
image_max_width
Specify the maximum width of the image in pixels for wrappers "round-image" and "raised-image".
Default: 150
Example: [display-posts post_type="contact" image_max_height="200" image_max_width="200"]
max_width
Specify the maximum width in pixels of the cards for wrappers "card" and "vertical-card". Both use an image of size "medium" which is usually 300 pixels wide.
Default: 300 for "card" and 540 for "vertical-card"
Example: [display-posts post_type="contact" wrapper="vertical-card" max_width="600"]
name_class
Specify the class name used for the name.
Default: name
Example: [display-posts post_type="contact" wrapper="card" name_class="my-names"]
position_class
Specify the class name used for the job position.
Default: position
Example: [display-posts post_type="contact" wrapper="card" position_class="my-positions"]
image_class
Specify the class name used for the image.
Default: image
Example: [display-posts post_type="contact" wrapper="card" image_class="my-images"]
text_class
Specify the class name used for the text.
Default: text
Example: [display-posts post_type="contact" wrapper="card" text_class="my-text"]
social_listing_class
Specify the class name used for the social listing.
Default: social_list
Example: [display-posts post_type="contact" wrapper="card" social_listing_class="my-social-list"]
social_item_class
Specify the class name used for the social items.
Default: social-item social
Example: [display-posts post_type="contact" wrapper="card" social_item_class="my-social-item"]
email_class
Specify the class name used for the social email item.
Default: social-item email
Example: [display-posts post_type="contact" wrapper="card" email_class="my-social-email-item"]
phone_class
Specify the class name used for the social phone item.
Default: social-item phone
Example: [display-posts post_type="contact" wrapper="card" phone_class="my-social-phone-item"]
include_name
Include the name.
Default: true
Example: [display-posts post_type="contact" wrapper="vertical=card" include_name="false"]
include_position
Include the position.
Default: true
Example: [display-posts post_type="contact" wrapper="vertical=card" include_position="false"]
include_text
Include the text.
Default: true
Example: [display-posts post_type="contact" wrapper="vertical=card" include_text="false"]
include_image
Include the image.
Default: true
Example: [display-posts post_type="contact" wrapper="vertical=card" include_image="false"]
include_email
Include the email.
Default: true
Example: [display-posts post_type="contact" wrapper="vertical=card" include_email="false"]
include_phone
Include the phone.
Default: true
Example: [display-posts post_type="contact" wrapper="vertical=card" include_phone="false"]
include_social
Include the social and business accounts.
Default: true
Example: [display-posts post_type="contact" wrapper="vertical=card" include_social="false"]
Custom Posts Field Names
The title (the_title()) depends on the post type:
- Alert => not used
- Booking => not used
- Contact => Name
- Event => Short Description
- FAQ => Question
- Fundraiser => Short Description
- News => Short Description
- Testimonial => Name
Alerts
- text (type wysiwyg)
- color (type select)
Booking
- start_date (type date_picker)
- end_date (type date_picker)
- status (type radio)
- comment (type wysiwyg)
Contacts
- position (type text)
- email (type email)
- phone (type text)
- text (type wysiwyg)
- twitter_url (type url)
- facebook_url (type url)
- instagram_url (type url)
Event
- image (type image)
- start_date (type date_time_picker)
- end_date (type date_time_picker)
- text (type wysiwyg)
- image_position (type radio)
FAQ
- text (type wysiwyg)
- image (type image)
- image_position (type radio)
Fundraiser
- text (type wysiwyg)
- image (type image)
- image_position (type radio)
News
- text (type wysiwyg)
- image (type image)
- image_position (type radio)
Testimonial
- picture (type image)
- gender (type radio)
- title (type wysiwyg)
- stars (type number)
- text (type wysiwyg)
Image Slider
Adding images to the slider
The video shows how to add images to the slider. We set up your main image slider to show all images with the category "Slider". You need to use the appropriate category should your webpage contain multiple sliders.
Remove image from the slider
The video shows how to remove an image from the slider. It's done by unchecking the "Slider" category in the image. You need to use the appropriate category should your webpage contain multiple sliders.
Sample slider
This image slider is generated with help of the plugins "Media Library Assistant" and "Photonic Gallery & Lightbox". It pulls all images with a certain category into the slider.
 Mountain beside body of water with aurora borealis
- Lightning and gray clouds
- Snow covering pine tree
- Raindrops
- Gray clouds
- Two men hiking on snow mountain
- Pathway between green leaf trees
- Island during golden hour and upcoming storm
- Clouds
- Amazing waterfall with lush foliage on rocks
- Scenic view of snow capped mountains during night
- Raindrops
- Clouds
- Reindeer in the snow
- Green Tree
- Orange sky
- Pink Flowers Near Mountain Covered by Snow
- Green grass field near houses
- Scenic View Of Mountains During Dawn